 Jan König
In this lecture, you will learn how to create a new voice app project with Jovo, an open source development framework for Alexa Skills and Google Actions.
- Introduction to Jovo
- Installation
- Creating a New Project
- Understanding the Jovo App Logic
- Next Steps
Introduction to Jovo
Jovo is a simple and open source framework to build cross-platform voice applications. Instead of having to build distinct apps for your Alexa Skill and Google Action, you can now have one platform-agnostic source of code that works with both voice APIs. Throughout this course, you will learn how to use the Jovo Framework step by step. If you're interested in learning more about Jovo now, here are some resources:
Installation
The best way to get started with Jovo is to install the Jovo Command Line Tools (see the GitHub repository), as it makes it easy to create new projects from templates. See our documentation for more other ways to get started with Jovo.
You can install the Jovo CLI by using the following command:
After the installation, you can test if everything worked with the following command:
This should look like this:
Great! Now you can use the command line to easily create new Jovo projects.
Creating a New Project
Let's create a new project. You can see from the console output above that it's possible to create new projects with the "new" command, which will clone the Jovo Sample App (default template) into the specified directory:
Success!
Understanding the Jovo App Logic
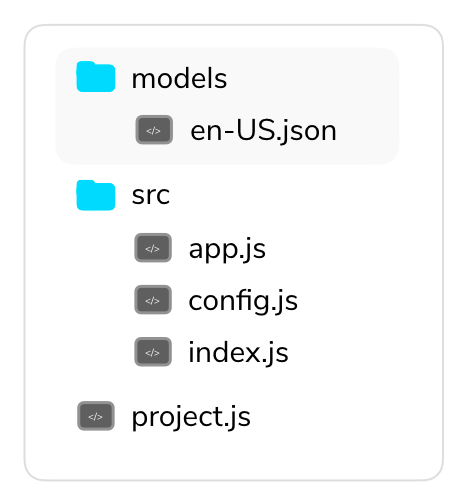
Let's take a look at the code provided by the sample application. For now, you only have to touch the app.js file. This is where the logic will happen. The folder structure (see the docs) looks like this:
Let's take a look at the lower part first: The handler is where you will spend most of your time when you're building the logic behind your voice app. It already has a "HelloWorldIntent," as you can see below:
What's happening here?
When your app is opened, it triggers the LAUNCH intent, which contains a toIntent call to switch to the HelloWorldIntent. Here, the ask method is called to ask for the user's name. After they answer, the MyNameIsIntent gets triggered, which greets them with their name.
Next Steps
We have the voice app platform projects and the source code in place. In the last step of this course, we're connecting the code to the voice APIs from Amazon Alexa and Google Assistant (Dialogflow) to receive our first "Hello World":