Project Lifecycle
Learn more about the different steps of a Jovo project.
Introduction
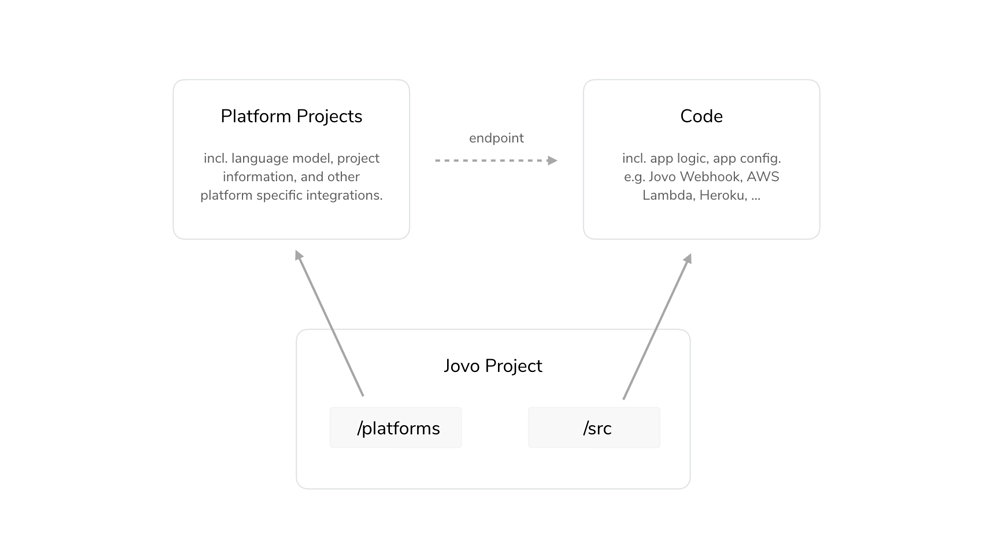
There are two main elements of a Jovo project:
srcfolder: The actual code of your app that is later hosted somewhere- Platform project related files, including
project.js,modelsandplatformsfolders
The two elements are connected by an endpoint that is used by the platform to send requests and receive responses (learn more about Requests and Responses here). This endpoint is where your app logic is executed with code.
Learn more about the different elements of a Jovo project in the following sections:
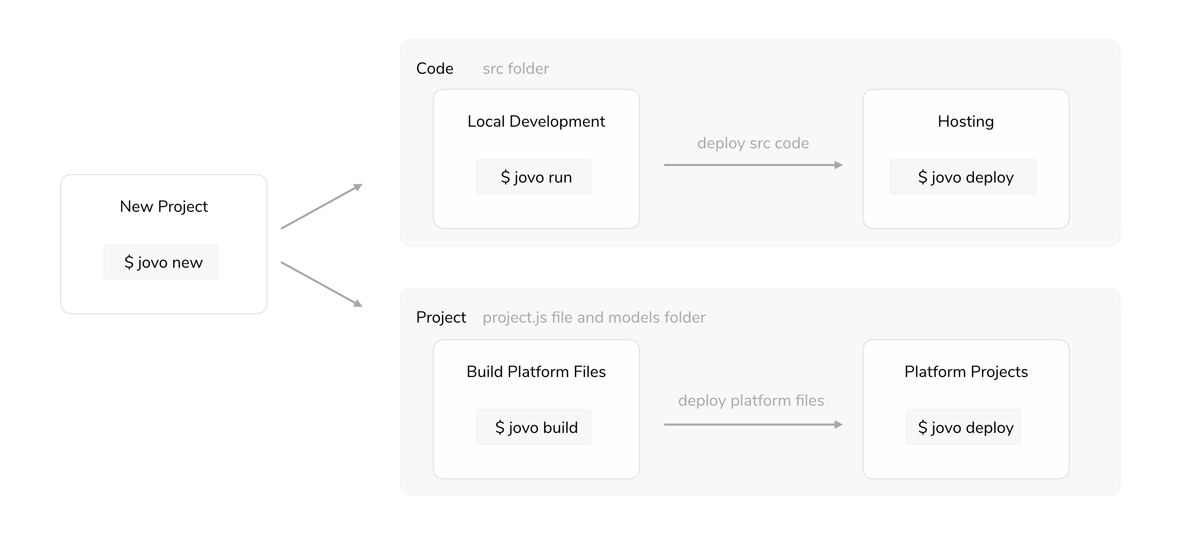
Creating a Jovo Project
You can create a new Jovo project by using the Jovo CLI:
For alternatives, see our Installation Guide.
Code
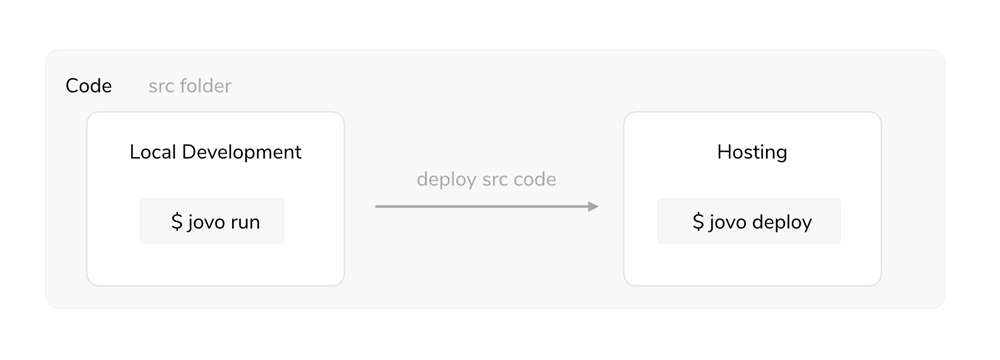
The source code in the src folder is where your app logic is run. The folder typically includes the following files:
app.js: App Instantiation and Logicconfig.js: App Configurationindex.js: Host Configuration
For faster debugging and development, Jovo comes with Local Development capabilities by using the jovo run command. After local debugging, the code can then be deployed to various Hosting providers.
Local Development
Jovo offers a development server based on ExpressJS for local testing and debugging.
You can use either of the following commands to run the server locally:
Make sure that, with every file update, you terminate the server with ctrl+c and run it again. You can also use the nodemon Jovo CLI integration.
$ jovo3 run should return this:
As you can see, a Jovo Webhook URL is automatically created, which serves as a link to your local webhook and can be added as a HTTPS endpoint to the voice platforms.
Here are all the services that can point to your local development server:
- Jovo Webhook (default)
- Alternatives
Jovo Webhook
The Jovo Webhook is a free service that creates a link to your local webserver. This way, you can prototype locally without having to deal with servers or Lambda uploads all the time.
By using the jovo run, a unique, anonymized link is created that looks like this:
This link simply makes it easier for you to prototype locally by being able to see the logs in your command line, and to make fast changes without uploading your code to AWS Lambda.
You can either use this link and paste it into the respective developer platform consoles, or use the jovo deploy command to upload it from the command line. Your Jovo Webhook URL is the default endpoint in your project.js file.
Alternatives
ngrok
Ngrok is a tunneling service that makes your localhost accessible to outside APIs.
You can download ngrok like so:
Hosting
For testing and running your app in production, you need to deploy the code to various hosting providers Jovo offers integrations for.
You can create a ready-to-deploy bundle.zip file with either of the following commands:
This will copy the src files into a bundle folder, run a production-only npm install, and then zip it.
If you have a Lambda endpoint defined in your project.js file, the jovo deploy command will not only deploy platform projects, but also bundle and upload your source code to AWS Lambda:
Platform Projects
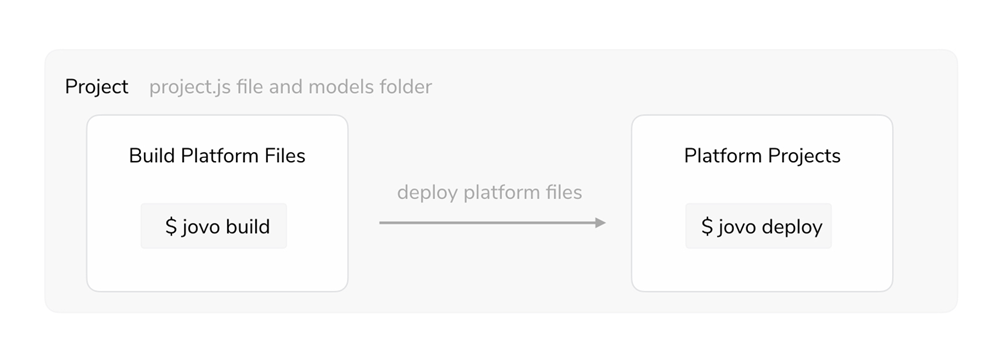
Besides the code in the src folder, there is also a number of project-related configurations and files that are mostly used to create and manage platform specific projects.
The following files are used:
project.js: Project Configurationmodelsfolder: Jovo Language Model filesplatformsfolder: Platform specific files
Build Platform Files
To create platform projects for e.g. Amazon Alexa or Google Assistant (Dialogflow), we first need to create platform specific files that are later deployed to each platform.
For this, the Jovo CLI uses the information in the project.js file and the models folder to create platform specific language models:
These files can then be deployed to the platforms.
Deploy Platform Projects
This command will deploy the files in the platforms folder to the platforms, for example Amazon Alexa or Dialogflow: