Google Assistant Platform Integration
Learn more about Google Assistant specific features that can be used with the Jovo Framework.
- Introduction
- $googleAction Object
- Jovo Language Model
- User Data & Permissions
- Google Action Interfaces
- Google Transactions
- Output
Introduction
Installation
Import the installed module, initialize and add it to the app object:
Quickstart
Install the Jovo CLI
We highly recommend using the Jovo CLI if you want to benefit from all the features coming with Jovo. You can learn more and find alternatives on our installation page.
Create a new Jovo Project
You can create a Jovo project into a new directory with the following command:
This will create a new folder, download the Jovo "Hello World" template, and install all the necessary dependencies so you can get started right away.
This is how a typical Jovo project looks like:
Run and Test the Code
To test the logic of your code, you can use the local development server provided by Jovo, and the Jovo Debugger.
To get started, use the following command:
This will start the development server on port 3000 and create a Jovo Webhook URL that can be used for local development. Copy this link and open it in your browser to use the Jovo Debugger.
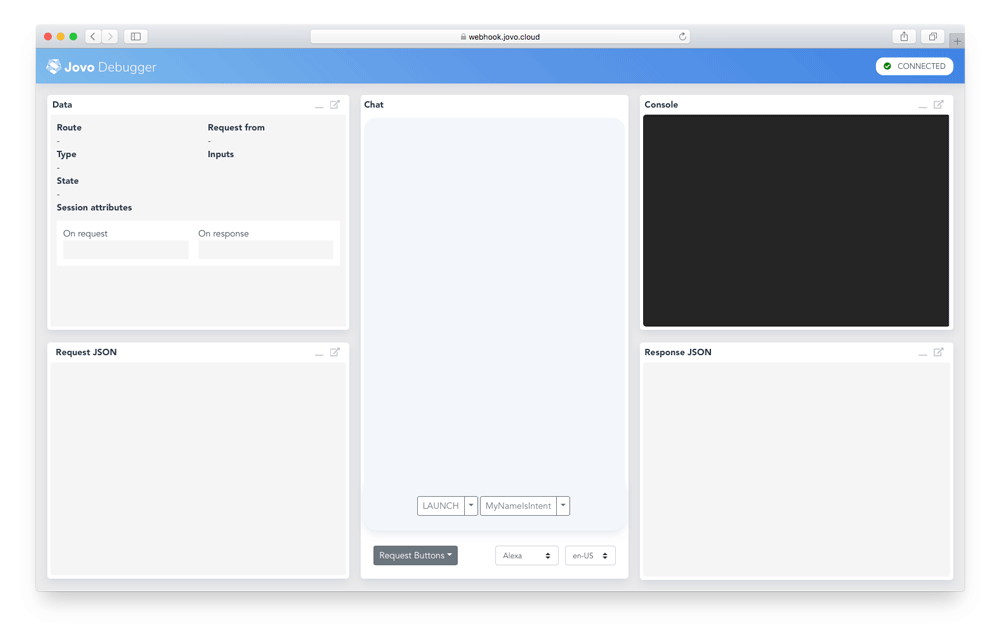
In the Debugger, you can quickly test if the flow of your voice app works. For this example, click on the LAUNCH button, and then specify a name on the MyNameIsIntent button. The Debugger will create requests and run them against your local webhook.
$googleAction Object
The $googleAction object holds references to every Google Action specific feature:
Jovo Language Model
For a general understanding of the Jovo Language Model, check out the platform-independent docs
You can add a dialogflow object at the root of the Jovo Language Model to add Dialogflow specific stuff using their original syntax. While building, it will be merged with the platform-independent stuff:
Session Entities
Session Entities work similar to Alexa Dynamic Entities in that you can enhance your existing static entities with dynamic ones to react to changes in user data or context. You can even choose whether to supplement or replace existing entities by providing an optional EntityOverrideMode.
Here is the official reference by Google: Session Entities.
Session Entities are stored for 20 minutes, although we recommend to clear every session entity as soon as the user session ends.
There are a lot of Google Action specific user data and permissions that your voice app can use, such as:
- Contact Information
- Location
- Date and Time
- Account Linking
You can find out more about your Google Action user's data here.
Google Action Interfaces
Google Transactions
The Google Transactions feature allows you to sell digital and physical goods in your Google Actions. You can find the documentation here.
Output
Besides the platform independent basic output capabilities and the ones specified in the Interfaces section of the docs, the Google Action platform supports the following two features:
Multiple Reprompts
Google Assistant allows to add multiple reprompts that are spoken out in order if there is no response by the user. Here is the official reference by Google: Static Reprompts.
The reprompts can be added to the ask method adding more parameters:
The first two messages are usually reprompt messages, the third one is used to say goodbye to the user.
Confirmation
You can ask your user to confirm something using the following method:
The question should be one which can be answered with yes or no.
The user's response will be mapped to the ON_CONFIRMATION intent, where you can check wether they confirmed or not using this.$googleAction.isConfirmed():

 Jovo
Jovo