 Kaan Kilic
Learn how to host your Alexa Skills and Google Actions on Microsoft Azure with Azure Functions and Cosmos DB as your database.
Introduction
Microsoft Azure is the cloud provider by Microsoft. Azure provides a variety of cloud services, including Azure Functions (a serverless compute service) and Cosmos DB (a NoQSL database service).
In this tutorial, you will go through the steps needed to host your Alexa Skills and Google Actions on Microsoft Azure by using Azure Functions for your code, and Azure Cosmos DB for storing user specific data.
Azure Functions
Find the Docs here: Hosting: Azure Functions.
In this section, you will go through the necessary steps to host your voice app's code on Azure Functions:
Create Azure FunctionApp
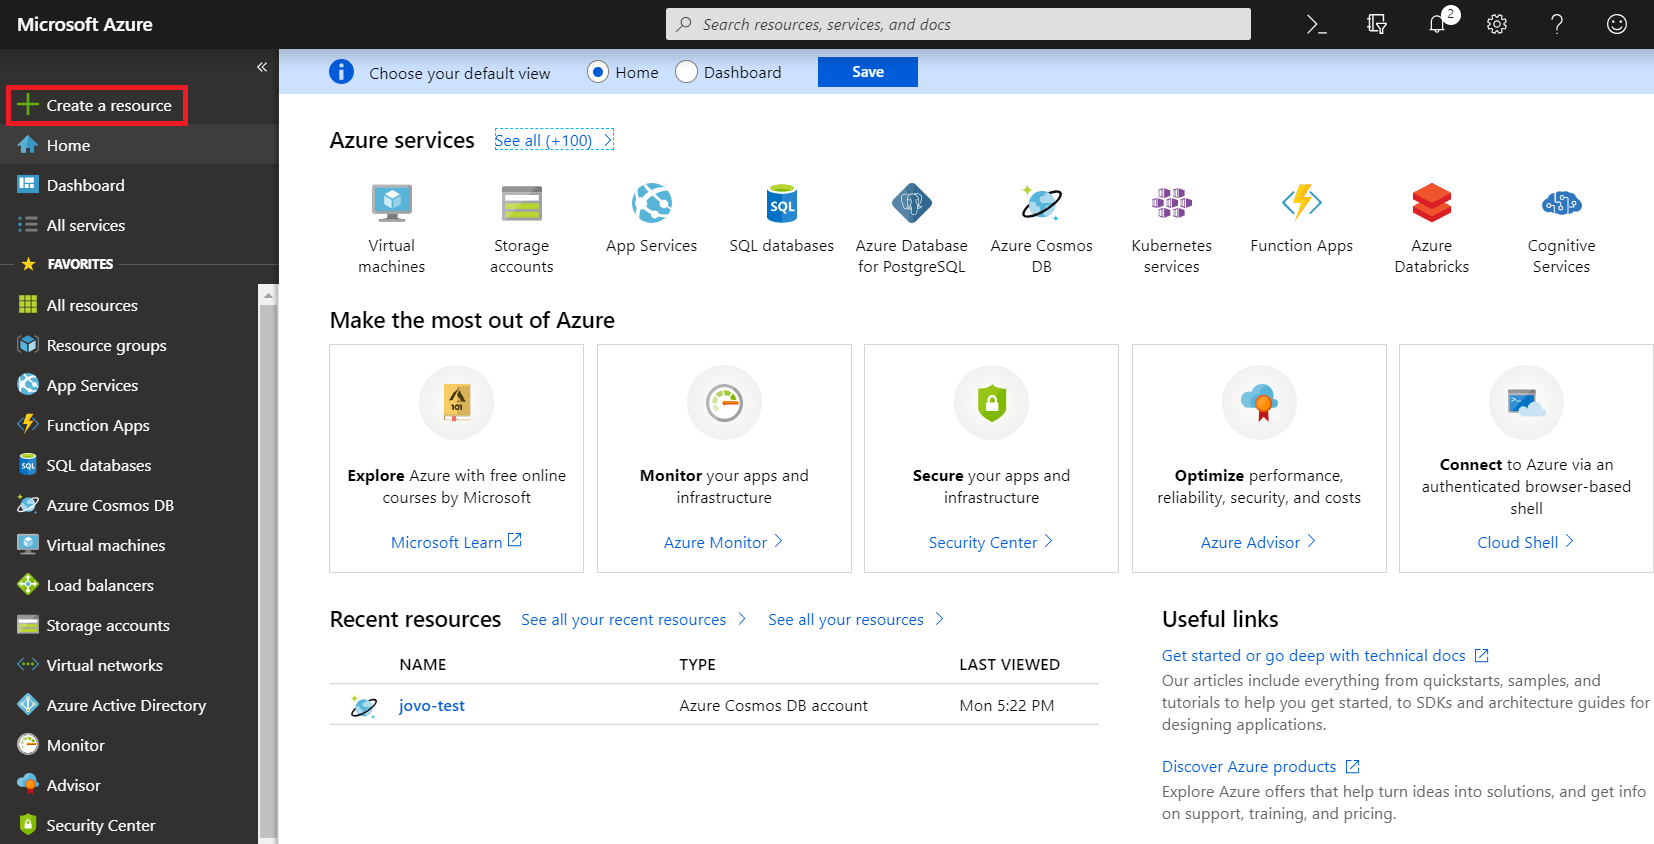
First of all, you have to create an Azure FunctionApp. For that press the Create a resource button on the top left:
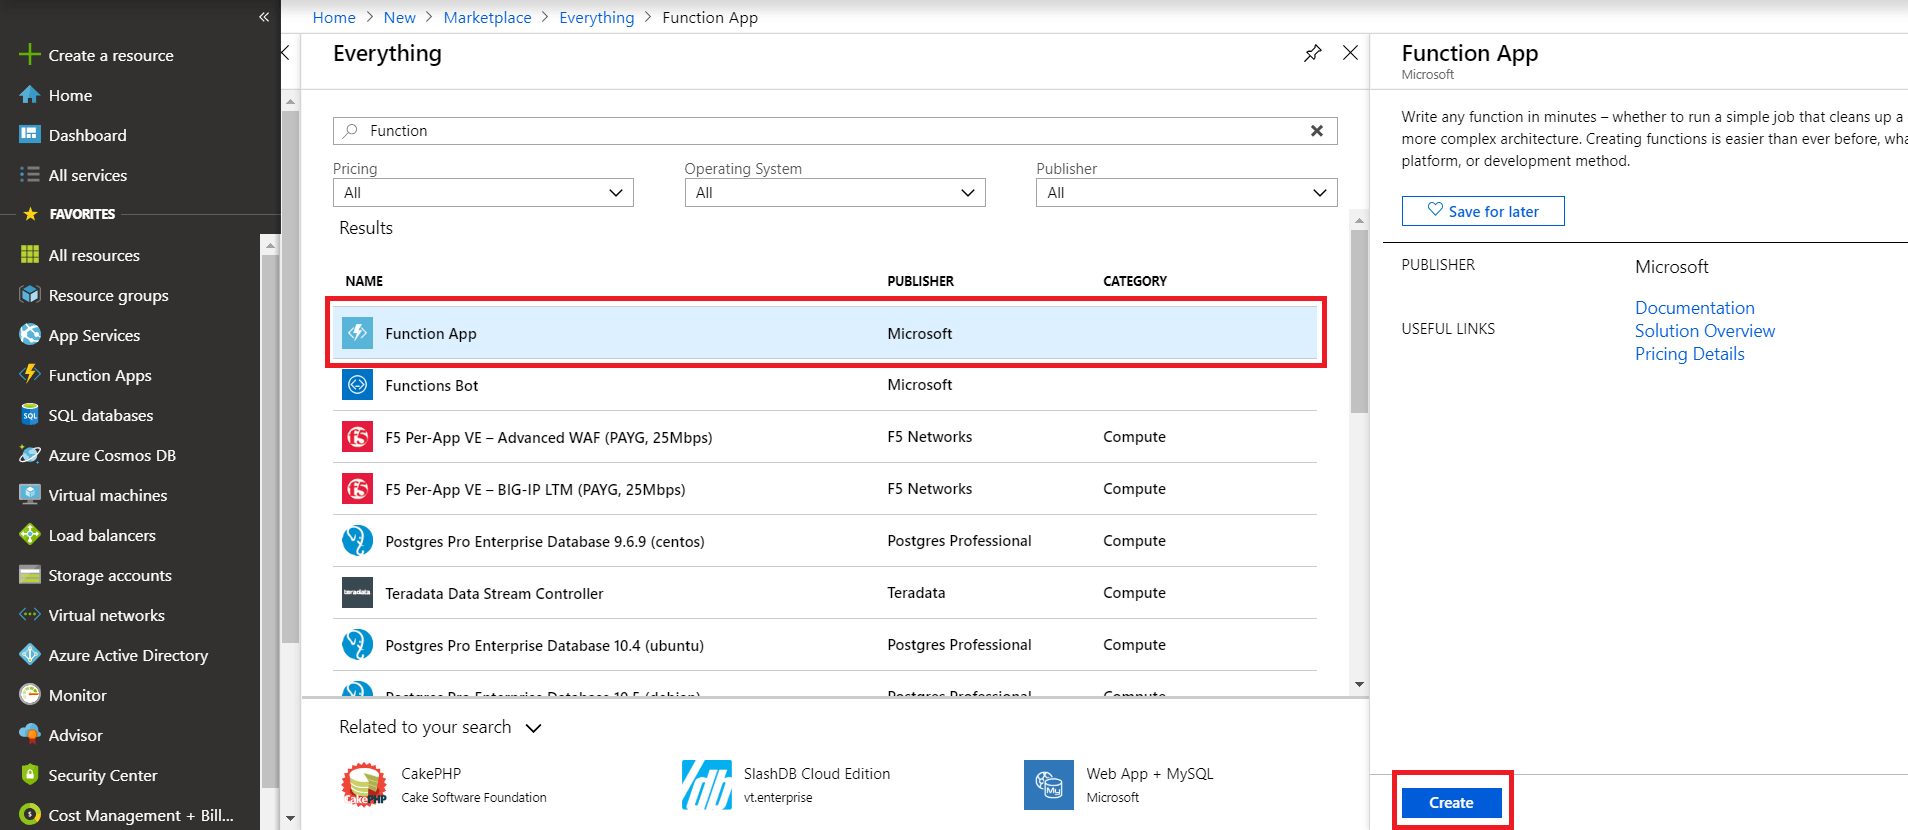
Search for Function and click on Function App and press Create on the bottom:
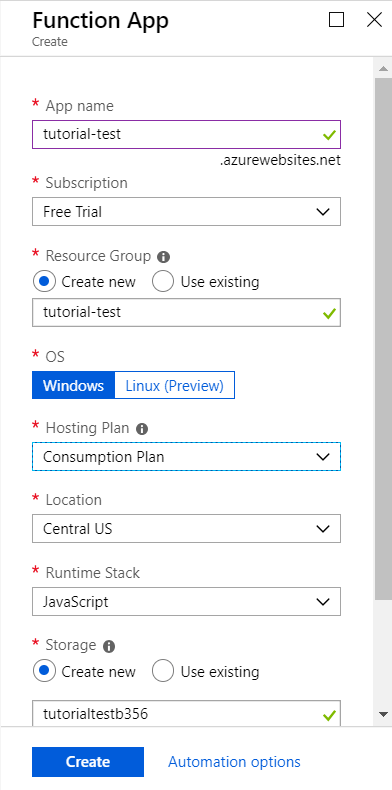
Name your Function App and select JavaScript as your Runtime Stack:
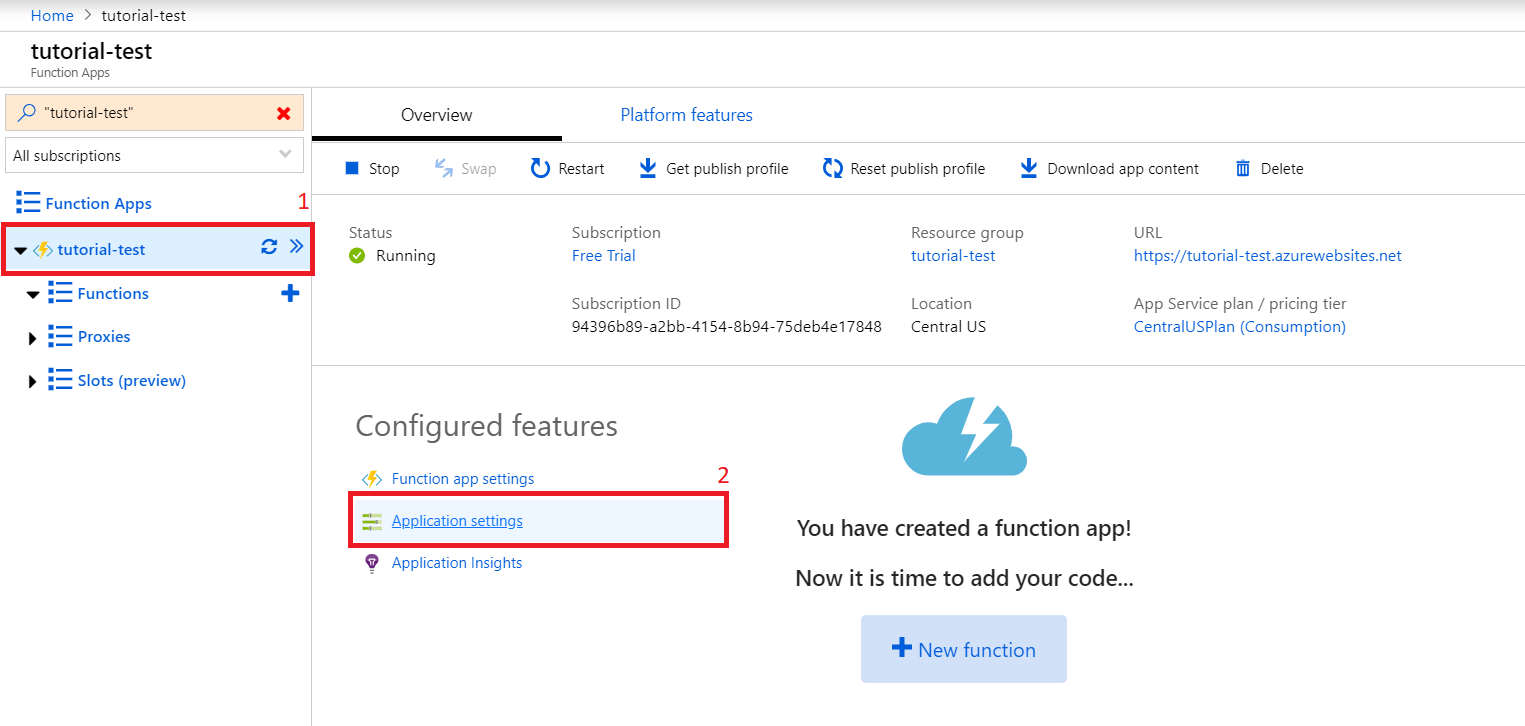
After your FunctionApp was created, click on it open up the Application Settings:
Scroll down to the Application Settings and create a new setting called WEBSITE_RUN_FROM_PACKAGE with the value 1:
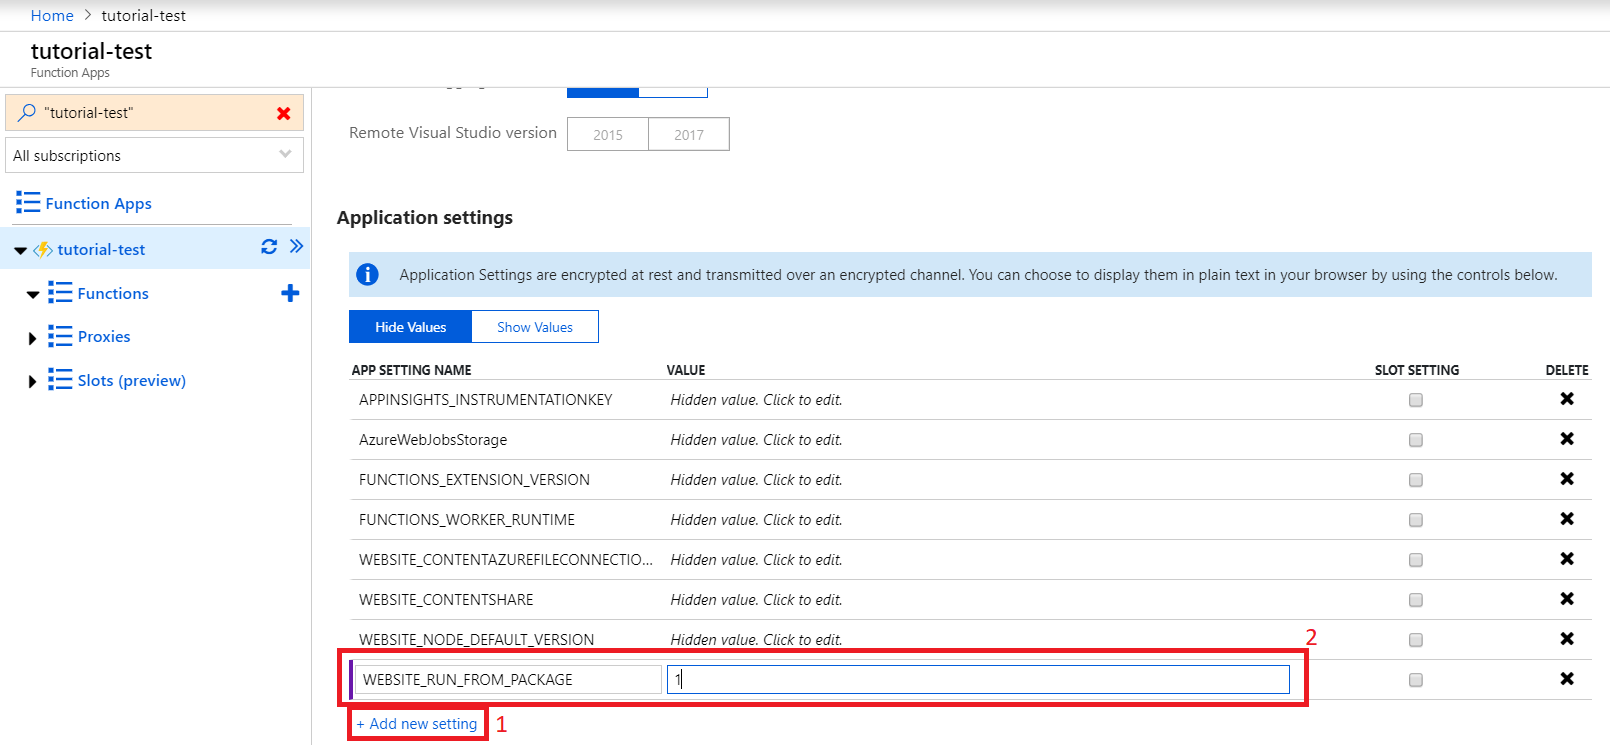
You can read about the benefits of that setting here
That's all you need to do here. Next, you have to make some configurations to your Jovo project.
Project Configuration to host on Azure Functions
To host your app on Azure, you need to make some changes to an existing file as well as create new ones.
Let's start with the existing one, which is the index.js file.
You have to first import the AzureFunction class. For example, you can simply replace the Lambda with AzureFunction at the top of the file:
Next, replace the bottom part, where it says AWS Lambda, with the following code:
Now create a new file called host.json inside the same directory as your index.js file (typically the src folder) with the following content:
As a last step, create a new folder, which you can name whatever want (e.g. "webhook"). It will be later used as your function's name. Inside that folder create a file called function.json and add the following:
To upload your project to Azure, you need to zip everything and upload it using the Azure CLI.
To create an optimized zip file run the npm run bundle command:
To upload the zip file, you need to the Azure CLI. You can find an installation guide for specific OS here
After you have successfully installed the CLI run the following command to upload the zip file:
This may take a while.
After the zip was uploaded, go back to the Azure dashboard, open up your new function and press Get function URL to get your endpoint URL:
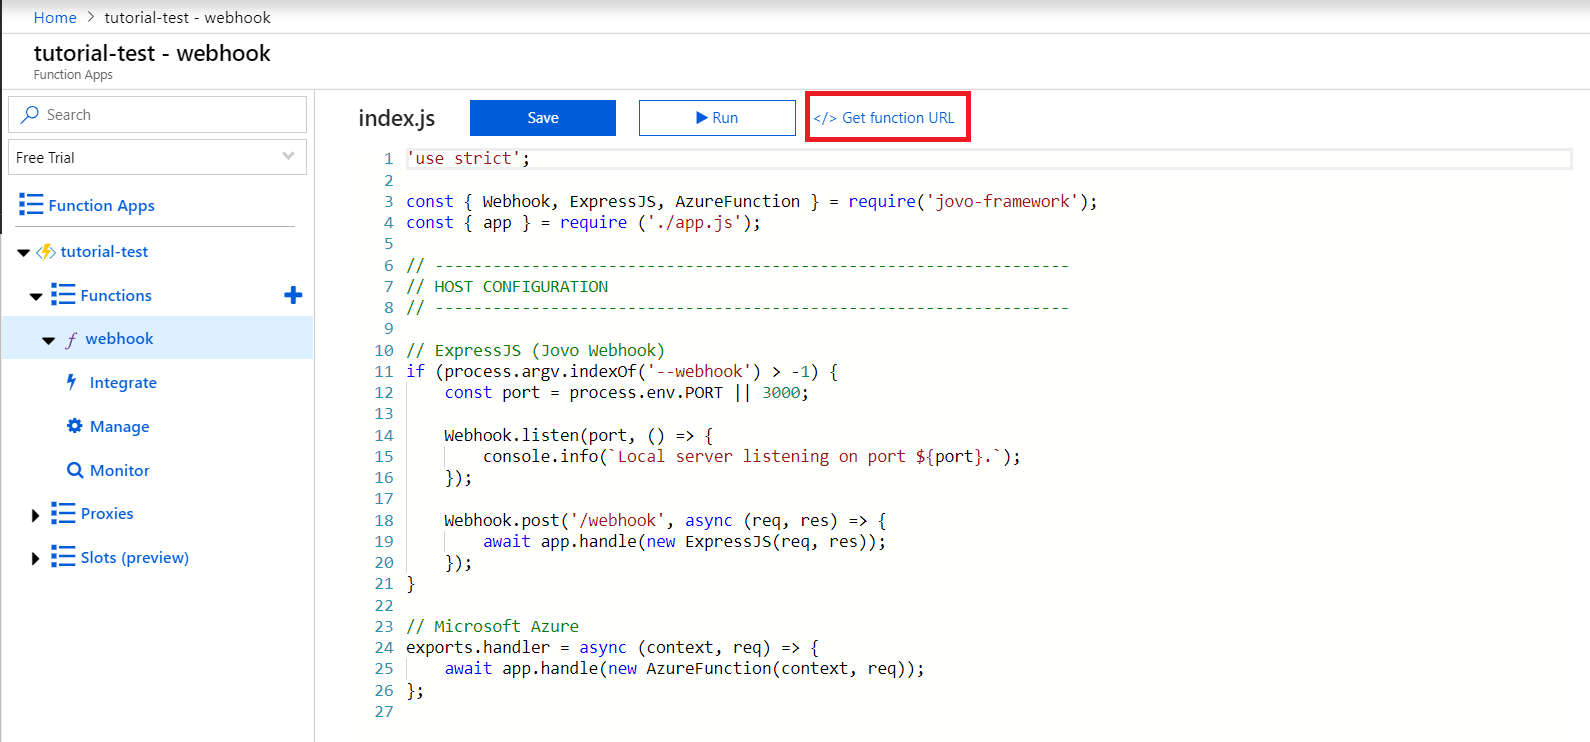
Copy the URL, add it as your endpoint for each platform and you're done.
The last thing left to do, is to set up Cosmos DB as your project's database.
Cosmos DB
Find the Docs here: Database: Cosmos DB.
Now that we have our code running on Azure Functions, we can't rely on the default database integration (FileDB) anymore. Learn how to use the Azure Cosmos DB to store user data in the following steps.
Create Cosmos DB Account
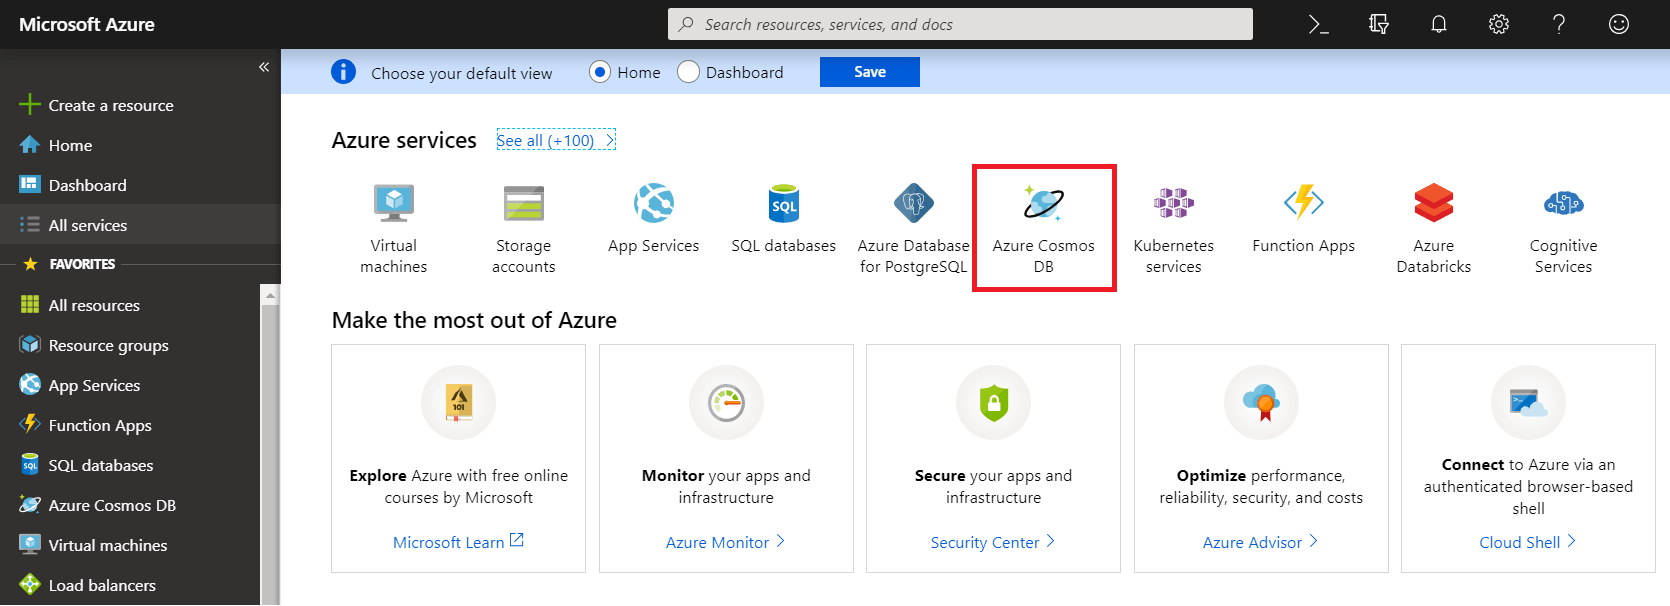
Open up the Microsoft Azure dashboard and select Azure Cosmos DB:
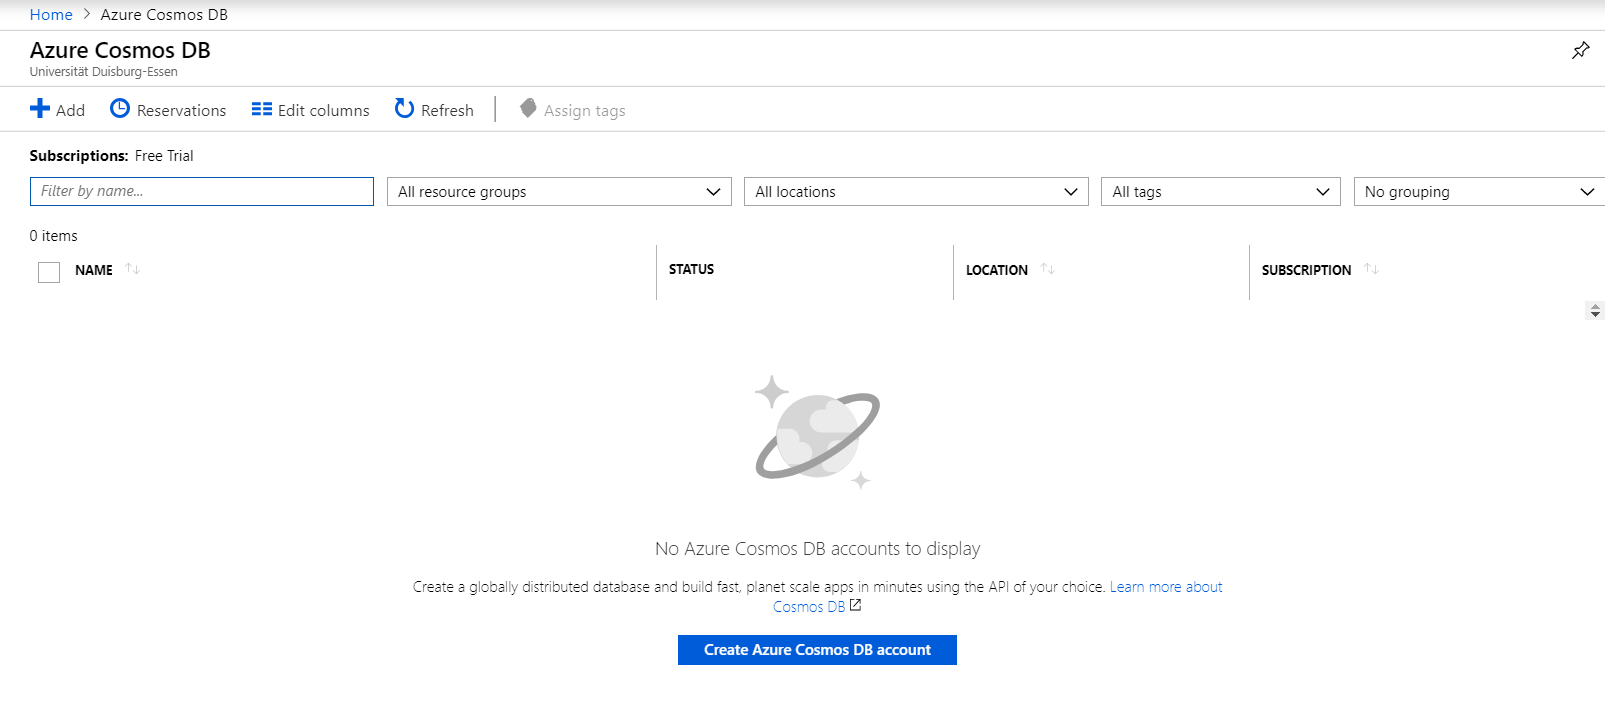
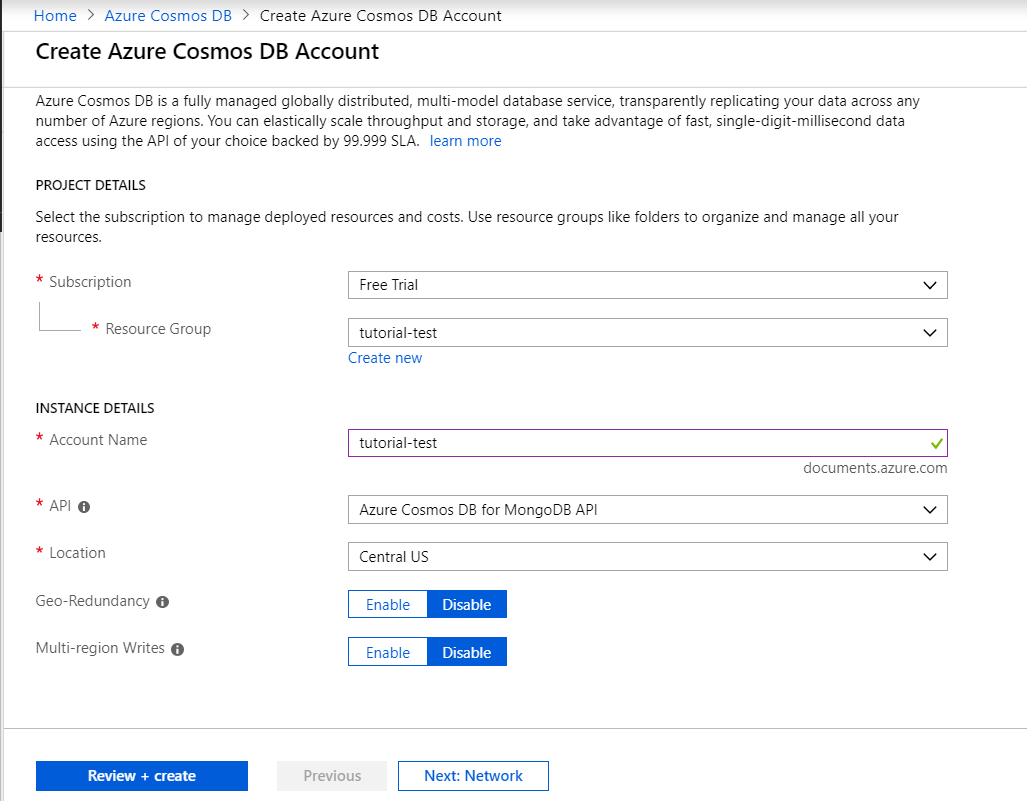
On the landing page press Create Service Account:
Name your account and select Azure Cosmos DB for MongoDB API as the API:
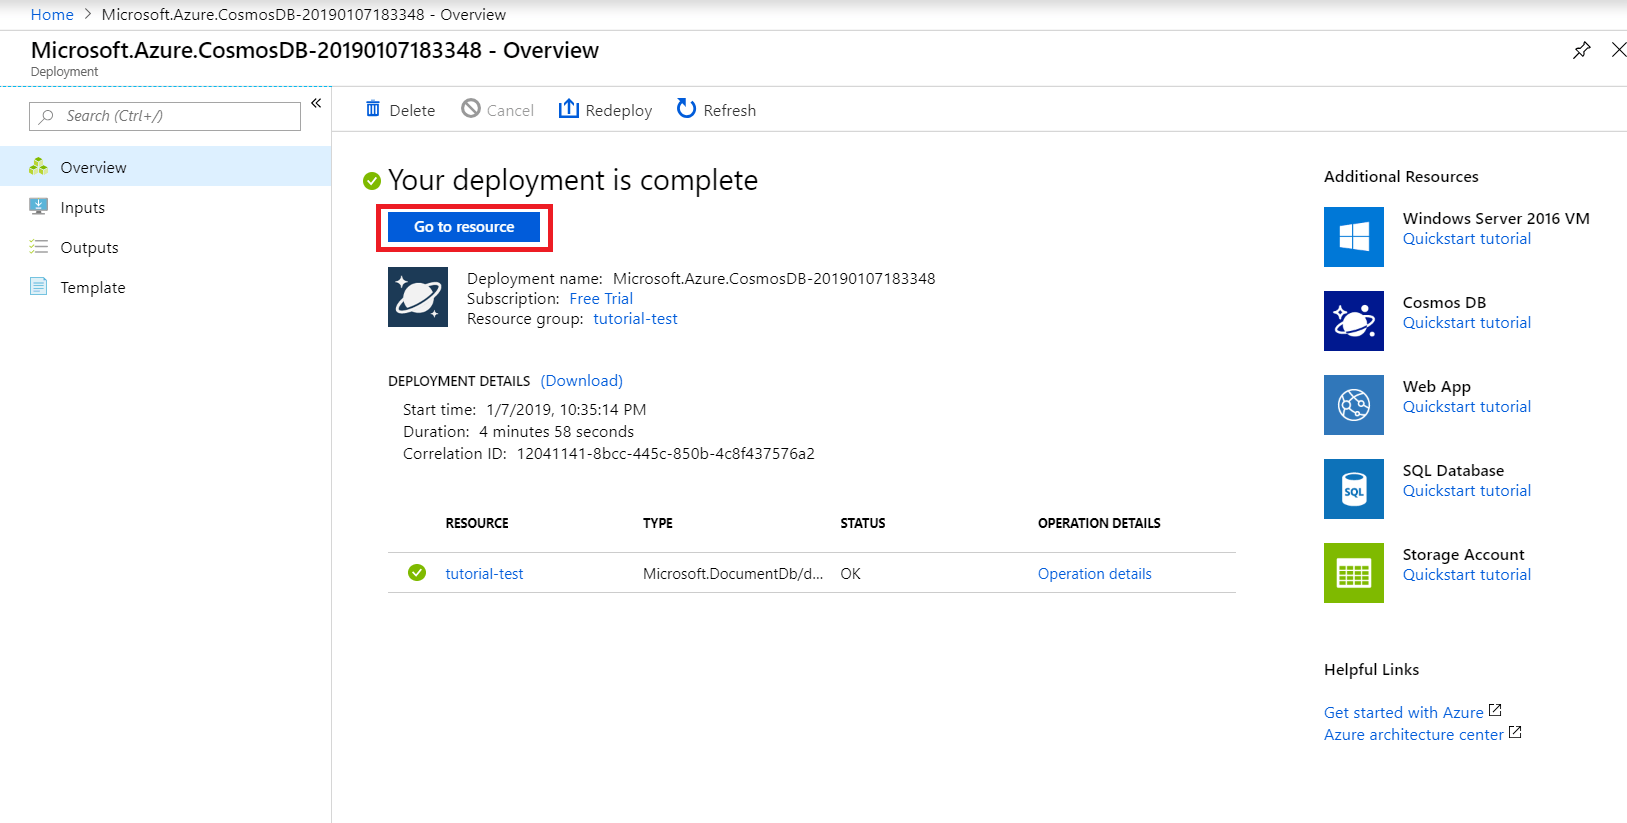
After Azure is done deploying, press Go to resource to get to your new Cosmos DB account:
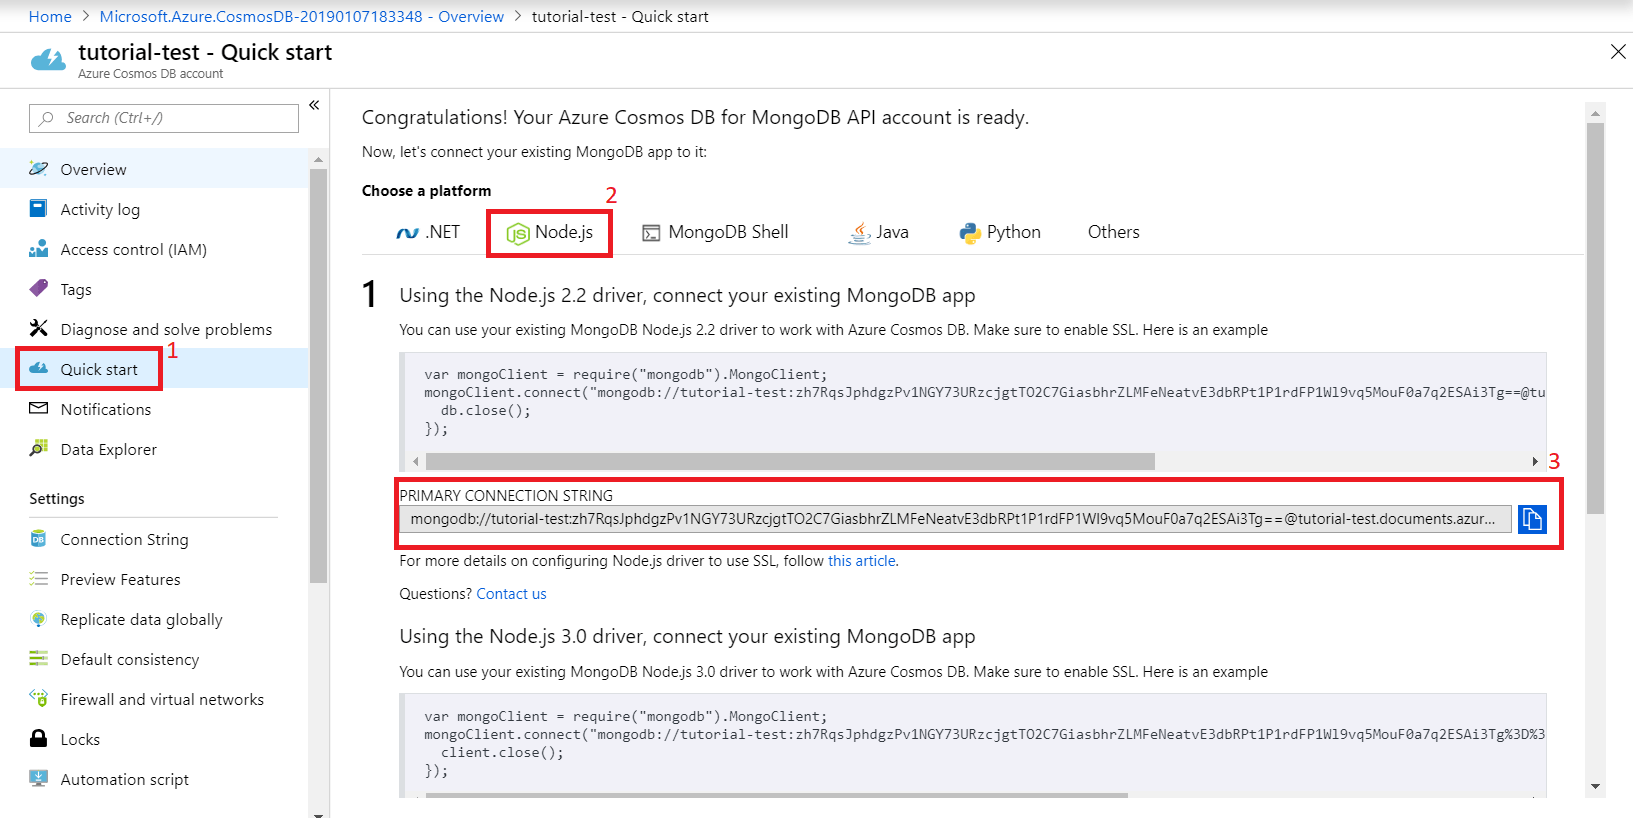
Switch to the Quick Start tab, choose Node.js as the platform to access your account's primary connection string, which we will need later on, so copy that:
Now you need to open up your Jovo project, because it's time to make the necessary configurations to use Cosmos DB as your project's database.
Project Configuration to use Cosmos DB
To use Cosmos DB in your project, you will need the jovo-db-cosmosdb plugin:
After that go to your app.js file and import as well as enable it:
Last but not least, you have to add the primary connection string and the table name to your config.js:
Optionally you can also add the collectionName, which is UserData by default:
That's it. Your project will now use Cosmos DB as its database.