 Kaan Kilic
In the previous Step 1: Streaming an Audio File, we played a single audio file on both Amazon Alexa and Google Assistant. Let's dive deeper. Before we can stream multiple files in a row we need at least some understanding how the respective audio players work.
The Alexa AudioPlayer
The Alexa AudioPlayer interface is needed to stream long-form audio with your skill, by sending out directives to start and stop the audio stream as well as notifying us about changes to the audio playback's state.
The only directive we currently need is the play directive, which we already used in the previous step to stream the audio file. After sending that directive, the current session ends and our skill will get registered as the most recent entity to play long-form audio. As a result, the user is now able to trigger the Alexa AudioPlayer's built-in intents, which offer the user control capabilities, without using our skill's invocation name, for example:
Alexa, pauseorAlexa, stoptrigger theAMAZON.PauseIntentAlexa, resumetriggers theAMAZON.ResumeIntentAlexa, nexttriggers theAMAZON.NextIntent
We will handle these intents in a later step.
AudioPlayer Requests
Currently far more interesting are the AudioPlayer requests that our skill will receive while streaming the audio file. These requests are used to notify us about changes to the playback state:
PlaybackStarted: Sent after starting to stream the audio file.PlaybackFinished: Sent after the stream finished.PlaybackStopped: Sent if the user manually pauses the audio stream (for example by sayingAlexa, ...).PlaybackFailed: Sent after Alexa encounters an error while attempting to play the audio file.PlaybackNearlyFinished: Sent when the current audio file is almost finished.
Our skill will receive at least one of the requests no matter what, which means we have to be able to handle the response (which can be just simply ending the session), otherwise, we will encounter an error, which has already happened to us in step one.
To make handling these requests easier for us, Jovo maps them to built-in intents inside an AUDIOPLAYER state:
For us, the PlaybackNearlyFinished request is the more important one. It is used to enqueue the next audio stream, which will start to play as soon as the current audio stream finishes. Besides the audio files URL and a token, we will need the current stream's token as well, to prevent the following kind of situation:
Expected Previous Token
To prevent that we specify the expected previous token when we enqueue the next audio file. In that case, it would work like this:
Currently we simply use the string token as our token, since we don't have a system in place that we could use for that. We will fix that at the end of the project.
PlaybackNearlyFinished
Since our goal in this step is to play another file after the first one finished, the most interesting audio player request is the PlaybackNearlyFinished one. That request is used to notify us that it's time to enqueue the next song. We set the expected token and enqueue the file using its URL and a new token:
Your handler should currently look like this:
Save the file and run the Jovo Webhook. It's time to test. Open up the Jovo Debugger and press the LAUNCH button, but don't forget to change your device back to an Alexa Echo.
The Google Assistant Media Response
The Google Assistant Media Response works a little different than Alexa's AudioPlayer, but there's a similarity. Just like Alexa you get into an AudioPlayer state (not the official name) after starting to stream the audio file using the Media Response interface.
Inside that state, Google takes over and handles stuff like pausing, resuming, skipping ahead X seconds, and more for you. Just like with Alexa, you will also be notified, in form of a request, after the audio stream finished, at which point you can start streaming the next one.
These requests will also be mapped to a built-in intent inside the AUDIOPLAYER state:
Inside that state, we play the next file using the same command introduced earlier in step one:
There are two more things to do before you can test the Google Action implementation:
- Add
this.tell()inthis.ask()for the Google Action (not the Alexa Skill). - Add Suggestion Chips.
To be able to receive these notifications, you have to signal that you want to stream another file. For this, you have to use this.ask() instead of this.tell(). However, it is important to not use the ask() method if the incoming request is from an Alexa device. While Google uses the ask as a signal to receive the notification, Alexa handles it completely differently. It treats like every other speech output and waits for the user's response, which delays the actual audio stream until after the reprompt. To fix that, we can move the ask() statement inside the correct if-block, and add tell() to the one for Alexa.
Suggestion Chips are small pressable buttons, which guide the user to possible responses.
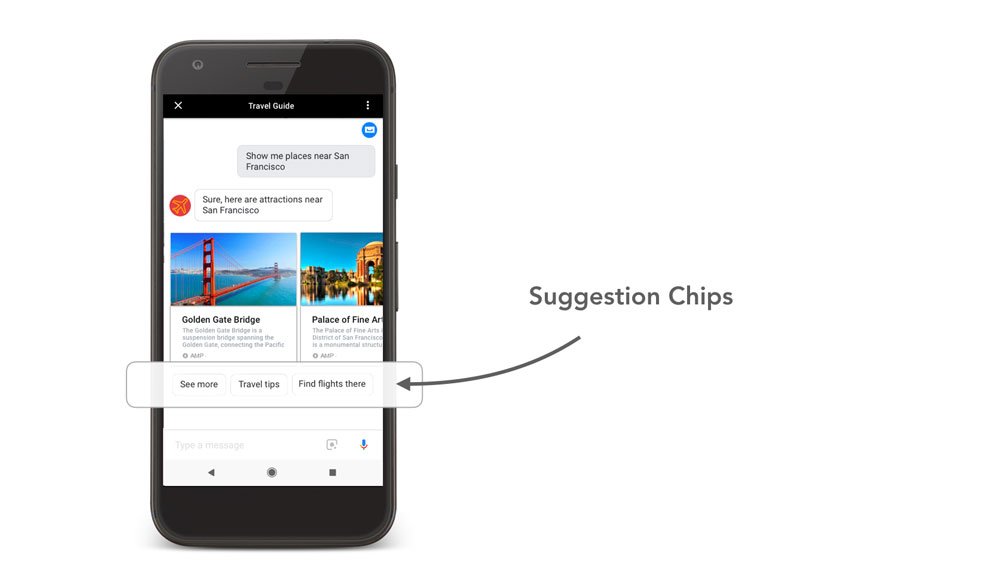
Tutorial: Implementing Google Assistant Suggestion Chips with Jovo.
We will make these changes both to the LAUNCH as well as the GoogleAction.Finished intent:
Alright, time to test. You probably already know how it works.
Before we move on to the next step, here's our handler's current state:
Next Step
In the next step, we will prepare our development environment to test our app on an Amazon Alexa or Google Assistant device from then on.